Adjustment
ADJUSTMENT
CAUTION / NOTICE / HINT
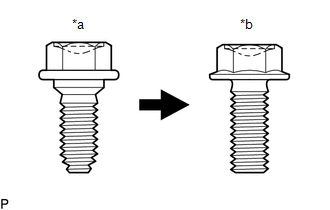
|
*a | Centering Bolt |
|
*b | Standard Bolt |
HINT:
- Centering bolts are used to install the hood hinges and hood lock. The
hood and hood lock cannot be adjusted with the centering bolts
installed. Substitute the centering bolts with standard bolts with
washers when making adjustments.
- The specified torque for standard bolts is shown in the standard bolt chart.
Click here 
PROCEDURE
1. INSPECT HOOD SUB-ASSEMBLY
Click here

2. ADJUST HOOD SUB-ASSEMBLY
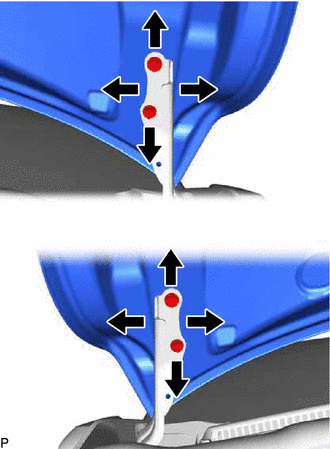
(a) Horizontally and vertically adjust the hood.
| (1) Loosen the 4 hinge bolts of the hood. | |
(2) Adjust the clearance between the hood and front fenders by moving the hood.
(3) Tighten the 4 hinge bolts after adjustment.
Torque:
13 N·m {133 kgf·cm, 10 ft·lbf}
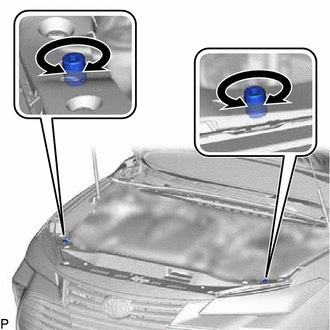
(b) Adjust the height of the front end of the hood using the hood bumper cushions.
| (1) Adjust the 2 hood bumper cushions so that the heights of the hood and fenders are aligned.
HINT: Raise or lower the front end of the hood by turning the 2 hood bumper cushions. |
|
(c) Adjust the hood lock.
(1) Remove the cool air intake duct seal.
Click here 
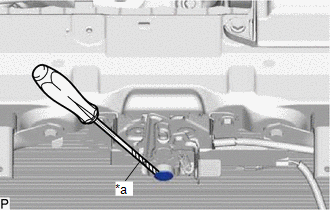
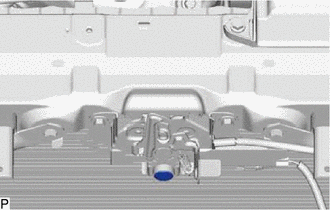
| (2) Using a screwdriver with its tip wrapped with protective tape, remove the hood lock nut cap. |
|
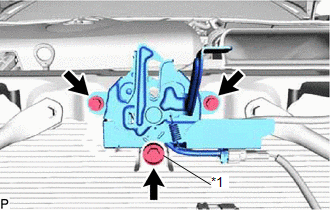
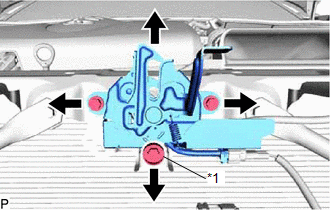
| (3) Loosen the 2 bolts and hood lock bolt. | |
| (4) Adjust the hood lock assembly and tighten the 2 bolts and hood lock bolt.
Torque: Bolt : 7.5 N·m {76 kgf·cm, 66 in·lbf} Hood Lock Bolt :
8.0 N·m {82 kgf·cm, 71 in·lbf} | |
(5) Check that the striker can engage the hood lock assembly smoothly.
| (6) Install a new hood lock nut cap. | |
(7) Install the cool air intake duct seal.
Click here

Components
COMPONENTS
ILLUSTRATION
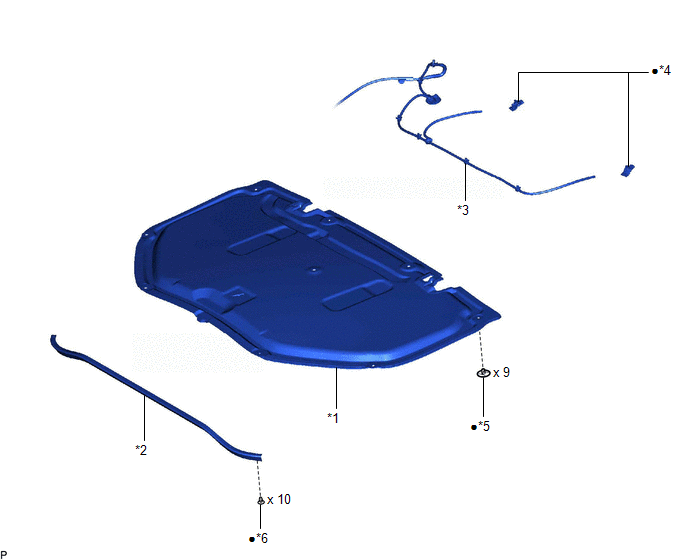
|
*1 | HOOD INSULATOR |
*2 | HOOD TO RADIATOR SUPPORT SEAL |
|
*3 | WASHER HOSE ASSEMBLY |
*4 | WASHER NOZZLE SUB-ASSEMBLY |
|
*5 | HOOD INSULATOR CLIP |
*6 | HOOD TO RADIATOR SUPPORT SEAL CLIP |
|
â—Ź | Non-reusable part |
- | - |
ILLUSTRATION
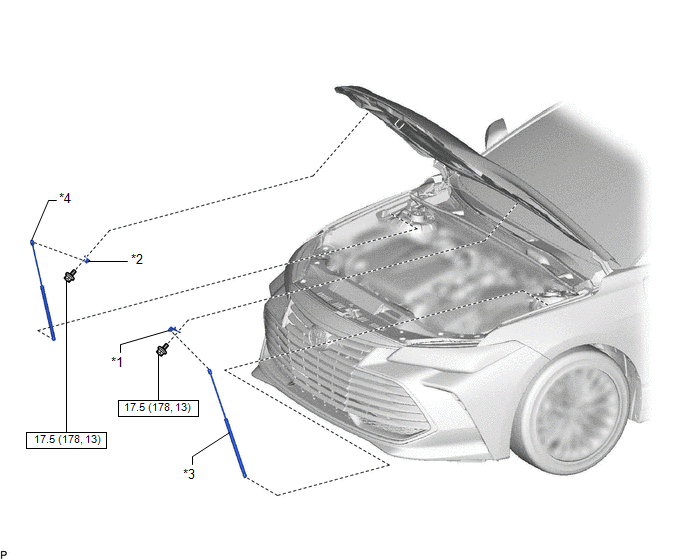
|
*1 | HOOD STAY BRACKET LH |
*2 | HOOD STAY BRACKET RH |
|
*3 | HOOD SUPPORT ASSEMBLY LH |
*4 | HOOD SUPPORT ASSEMBLY RH |
 |
N*m (kgf*cm, ft.*lbf): Specified torque |
- | - |
Disassembly
DISASSEMBLY
PROCEDURE
1. REMOVE HOOD TO RADIATOR SUPPORT SEAL
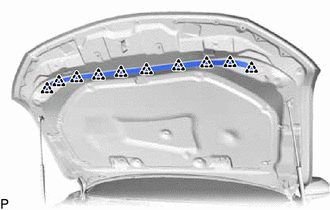
| (a) Using a clip remover, disengage the 10 hood to radiator support seal clips to remove the hood to radiator support seal. |
|
(b) Remove the 10 hood to radiator support seal clips from the hood to radiator support seal.
2. REMOVE HOOD INSULATOR
|
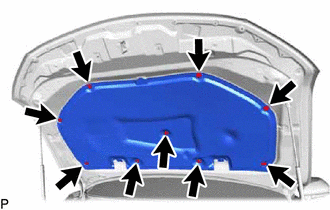
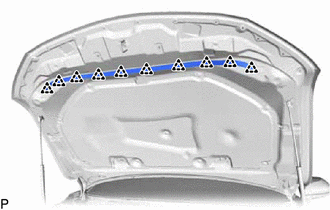
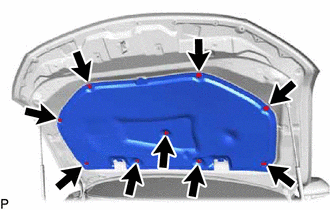
(a) Using a clip remover, remove the 9 hood insulator clips. |
|
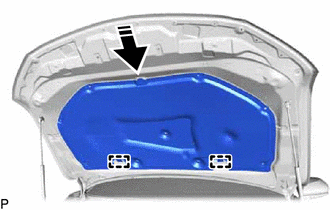
(b) Disengage the 2 guides to remove the hood insulator as shown in the illustration.
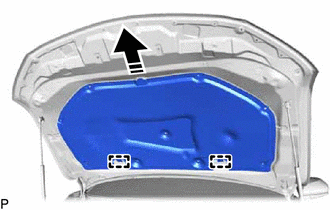
 |
Remove in this Direction |
3. REMOVE WASHER NOZZLE SUB-ASSEMBLY
Click here 
4. DISCONNECT WASHER HOSE ASSEMBLY
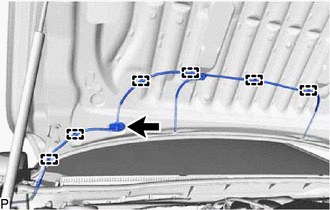
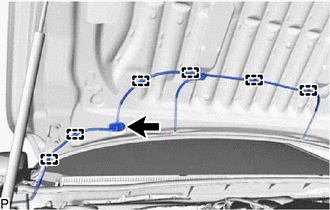
| (a) Disengage the 6 clamps. | |
(b) Disengage the grommet to disconnect the washer hose assembly.
5. REMOVE HOOD SUPPORT ASSEMBLY LH
Click here 
6. REMOVE HOOD STAY BRACKET LH
Click here 
7. REMOVE HOOD SUPPORT ASSEMBLY RH
HINT:
Use the same procedure as for the LH side.
8. REMOVE HOOD STAY BRACKET RH
HINT:
Use the same procedure as for the LH side.
On-vehicle Inspection
ON-VEHICLE INSPECTION
PROCEDURE
1. INSPECT HOOD SUB-ASSEMBLY
(a) Check that the clearance measurements of areas a through e are within each standard range.
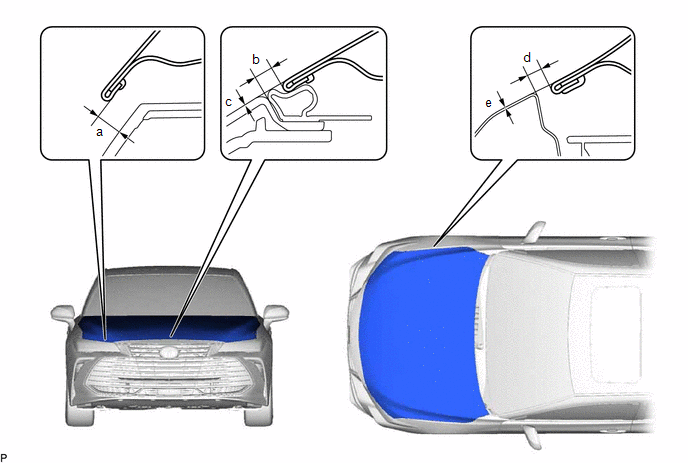 Standard Clearance
 |
Area | Measurement |
Area | Measurement |
|
a | 5.15 to 9.15 mm (0.203 to 0.360 in.) |
b | 2.75 to 6.75 mm (0.108 to 0.266 in.) |
|
c | -1.85 to 2.15 mm (-0.0728 to 0.0846 in.) |
d | 2.2 to 5.2 mm (0.0866 to 0.205 in.) |
|
e | -1.5 to 1.5 mm (-0.0591 to 0.0591 in.) |
- | - |
Reassembly
REASSEMBLY
PROCEDURE
1. INSTALL HOOD STAY BRACKET LH
Click here 
2. INSTALL HOOD SUPPORT ASSEMBLY LH
Click here 
3. INSTALL HOOD STAY BRACKET RH
HINT:
Use the same procedure as for the LH side.
4. INSTALL HOOD SUPPORT ASSEMBLY RH
HINT:
Use the same procedure as for the LH side.
5. CONNECT WASHER HOSE ASSEMBLY
(b) Engage the 6 clamps to connect the washer hose assembly.
6. INSTALL WASHER NOZZLE SUB-ASSEMBLY
Click here 
7. INSPECT WASHER NOZZLE SUB-ASSEMBLY
Click here 
8. ADJUST WASHER NOZZLE SUB-ASSEMBLY
Click here 
9. INSTALL HOOD INSULATOR
(a) Engage the 2 guides as shown in the illustration.
 |
Install in this Direction |
| (b) Install the hood insulator with 9 new hood insulator clips. |
|
10. INSTALL HOOD TO RADIATOR SUPPORT SEAL
| (a) Install the hood to radiator support seal with 10 new hood to radiator support seal clips. |
|









 Standard Clearance

